A tour of my workspace
 Home pottery studio
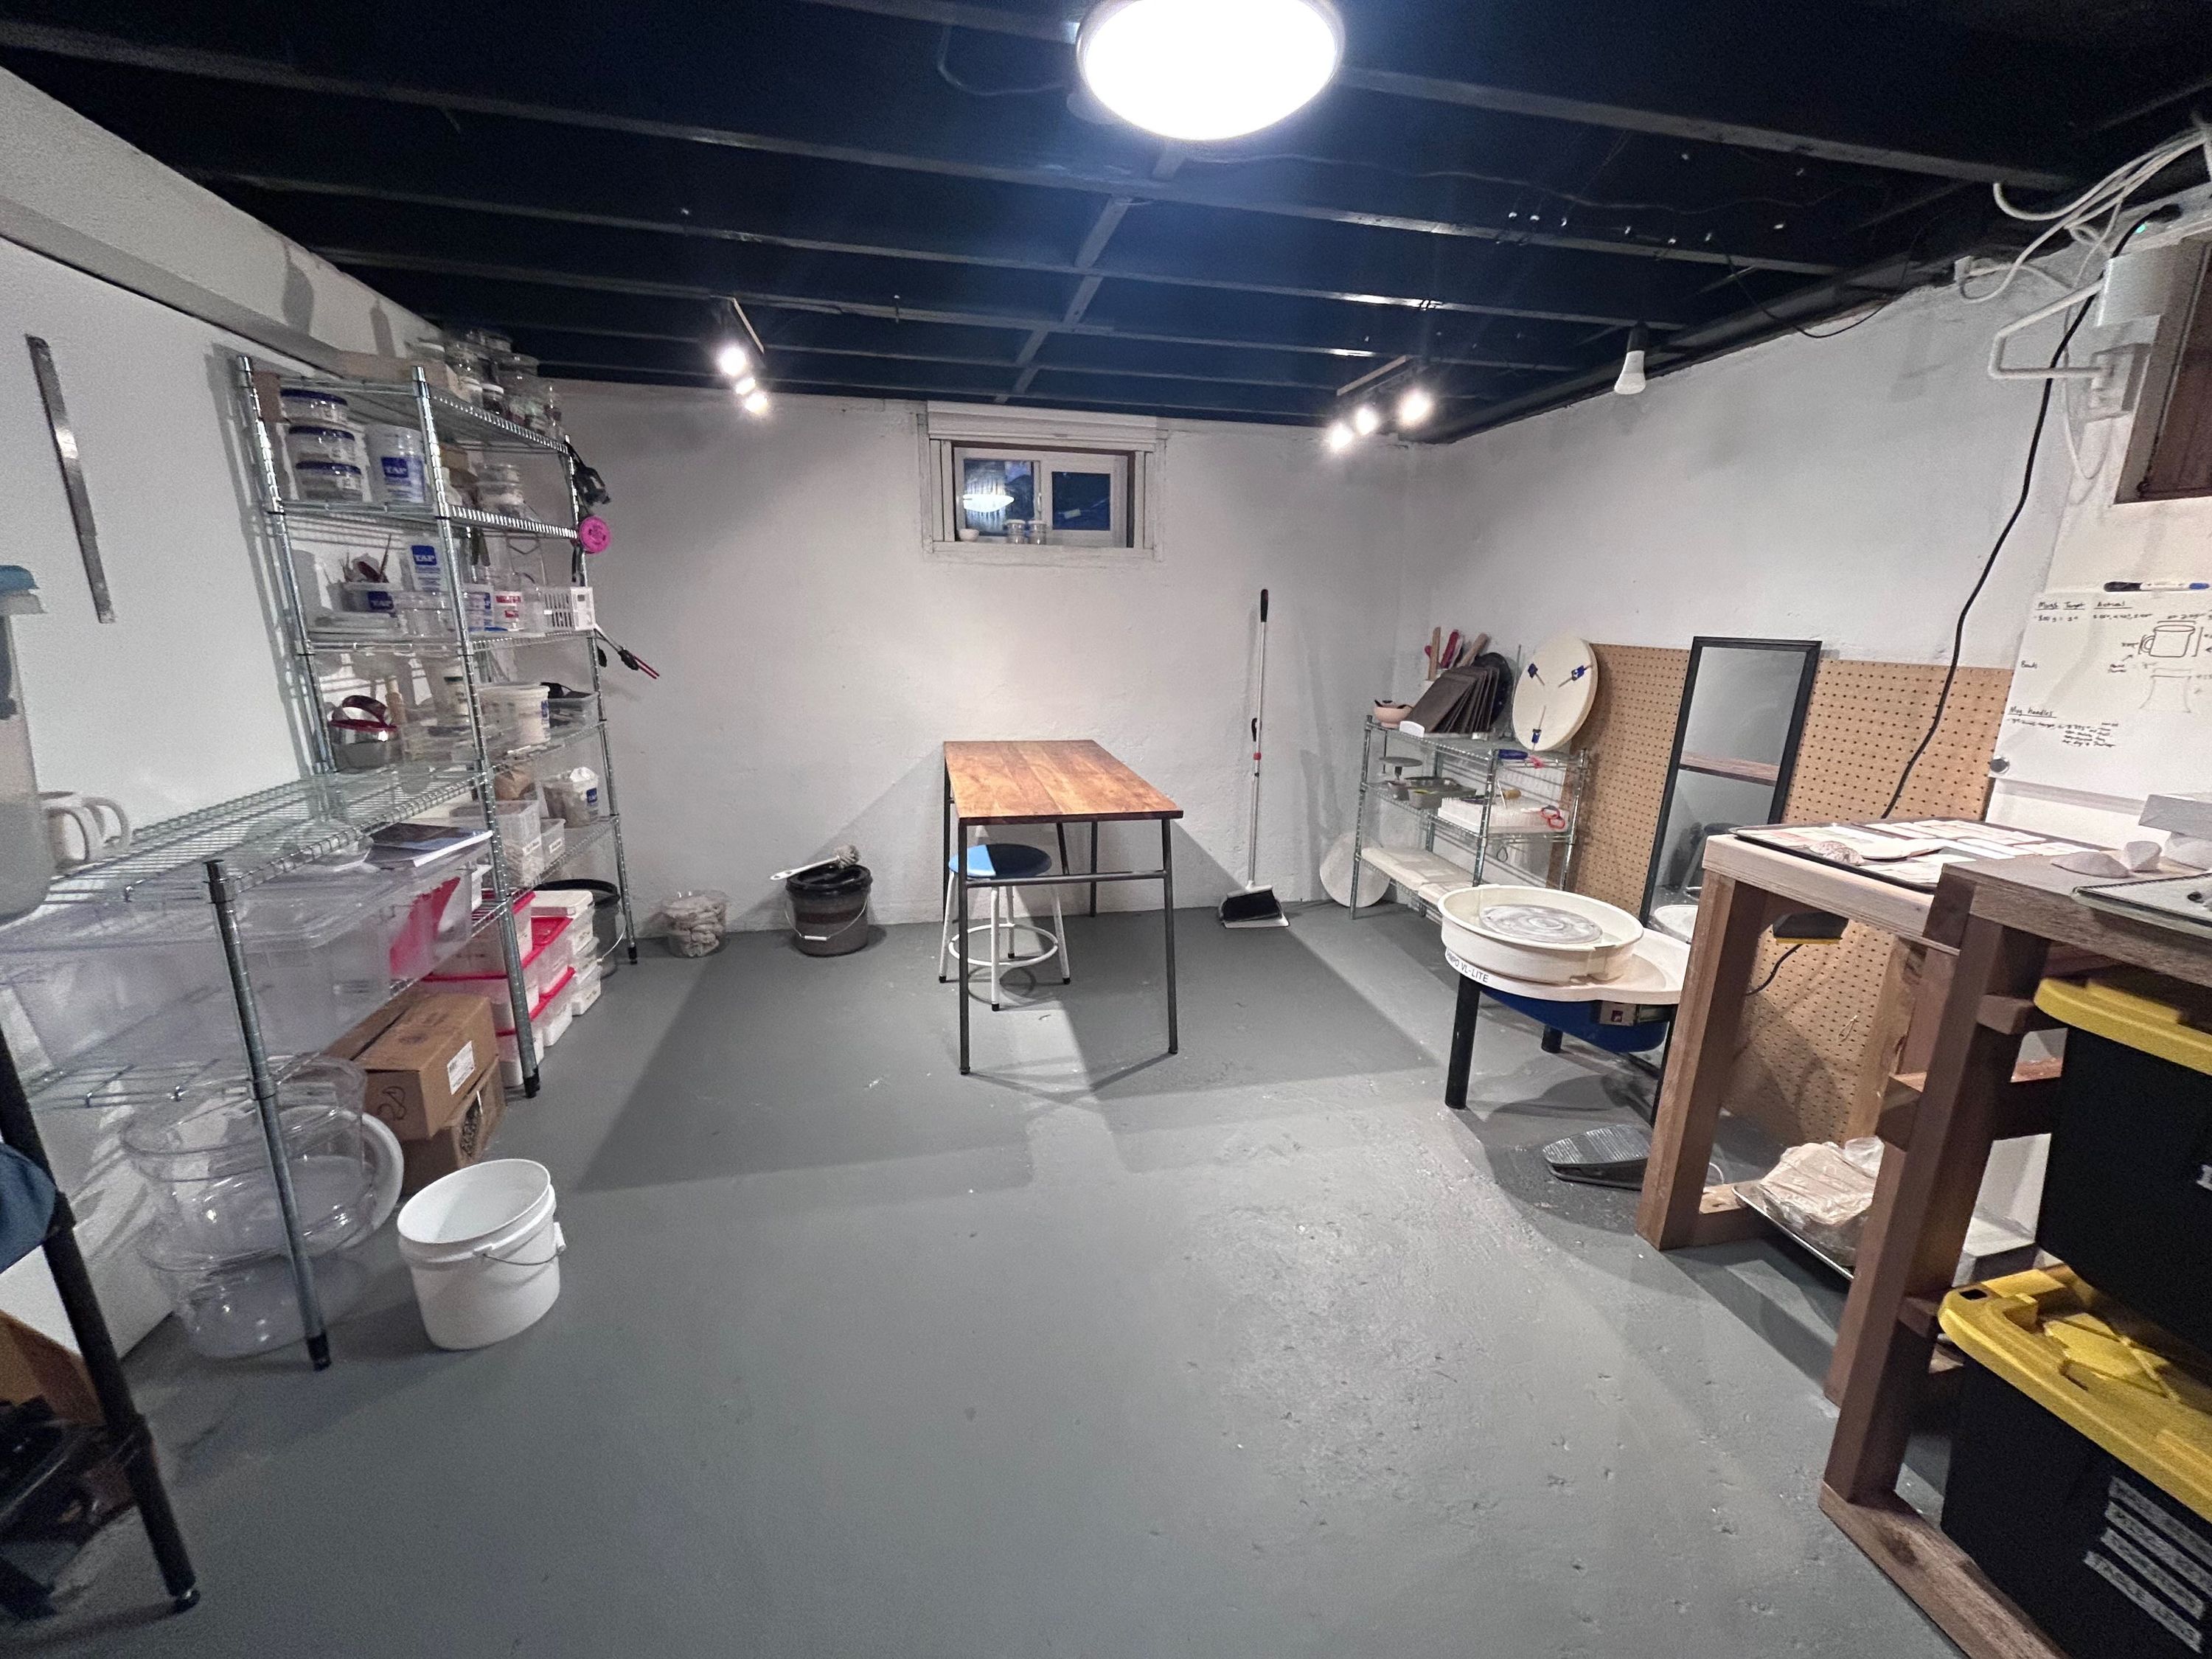
My home setup has evolved over time but here’s an overview of how I work. Its constantly a work in progress but I’m happy with its current state!
Originally when I first moved in, I intended to use a small outdoor shed for all of my projects. It was nice because it was fully separated from the main house, and so the mess of working with clay was fully separated as well. But it didn’t have running water, so I had large buckets of water for cleanup I’d clean out every 2-3 months. This was a pain and in the winter, the buckets would freeze if we had a cold snap. I also had clay and premixed glaze freeze which was also ended up being more problematic than I’d expect. On the flip side, in the summer the shed would keep swelteringly hot, and the wild changes in temperature made it difficult to have a consistent drying process.
The following summer after the first studio freeze, on a weekend whim I decided to reorganize my basement in order to move into that space. I moved my wheel, supplies, and clay below the main floor, which keeps at a consistent temperature throughout the year. The kiln stayed in the shed. In the basement, I also had access to a utility sink, which meant I could kick the buckets and finally stop cleaning out mystery sludge from the bottom of each rinse bucket (so gross).
Alright, here we go:
The wedging table
One the right side I have a small wedging table. This was made with some 2 x 4’s and I poured the plaster in afterwards. Its still holding up after a two years but one day I’ll probably want to redo the plaster. Under the wedging table, I store currently open bags of clay. I installed an Ikea spotlight above the wedging table. There isn’t a lot of natural light here especially in the winter, so any additional light helps.
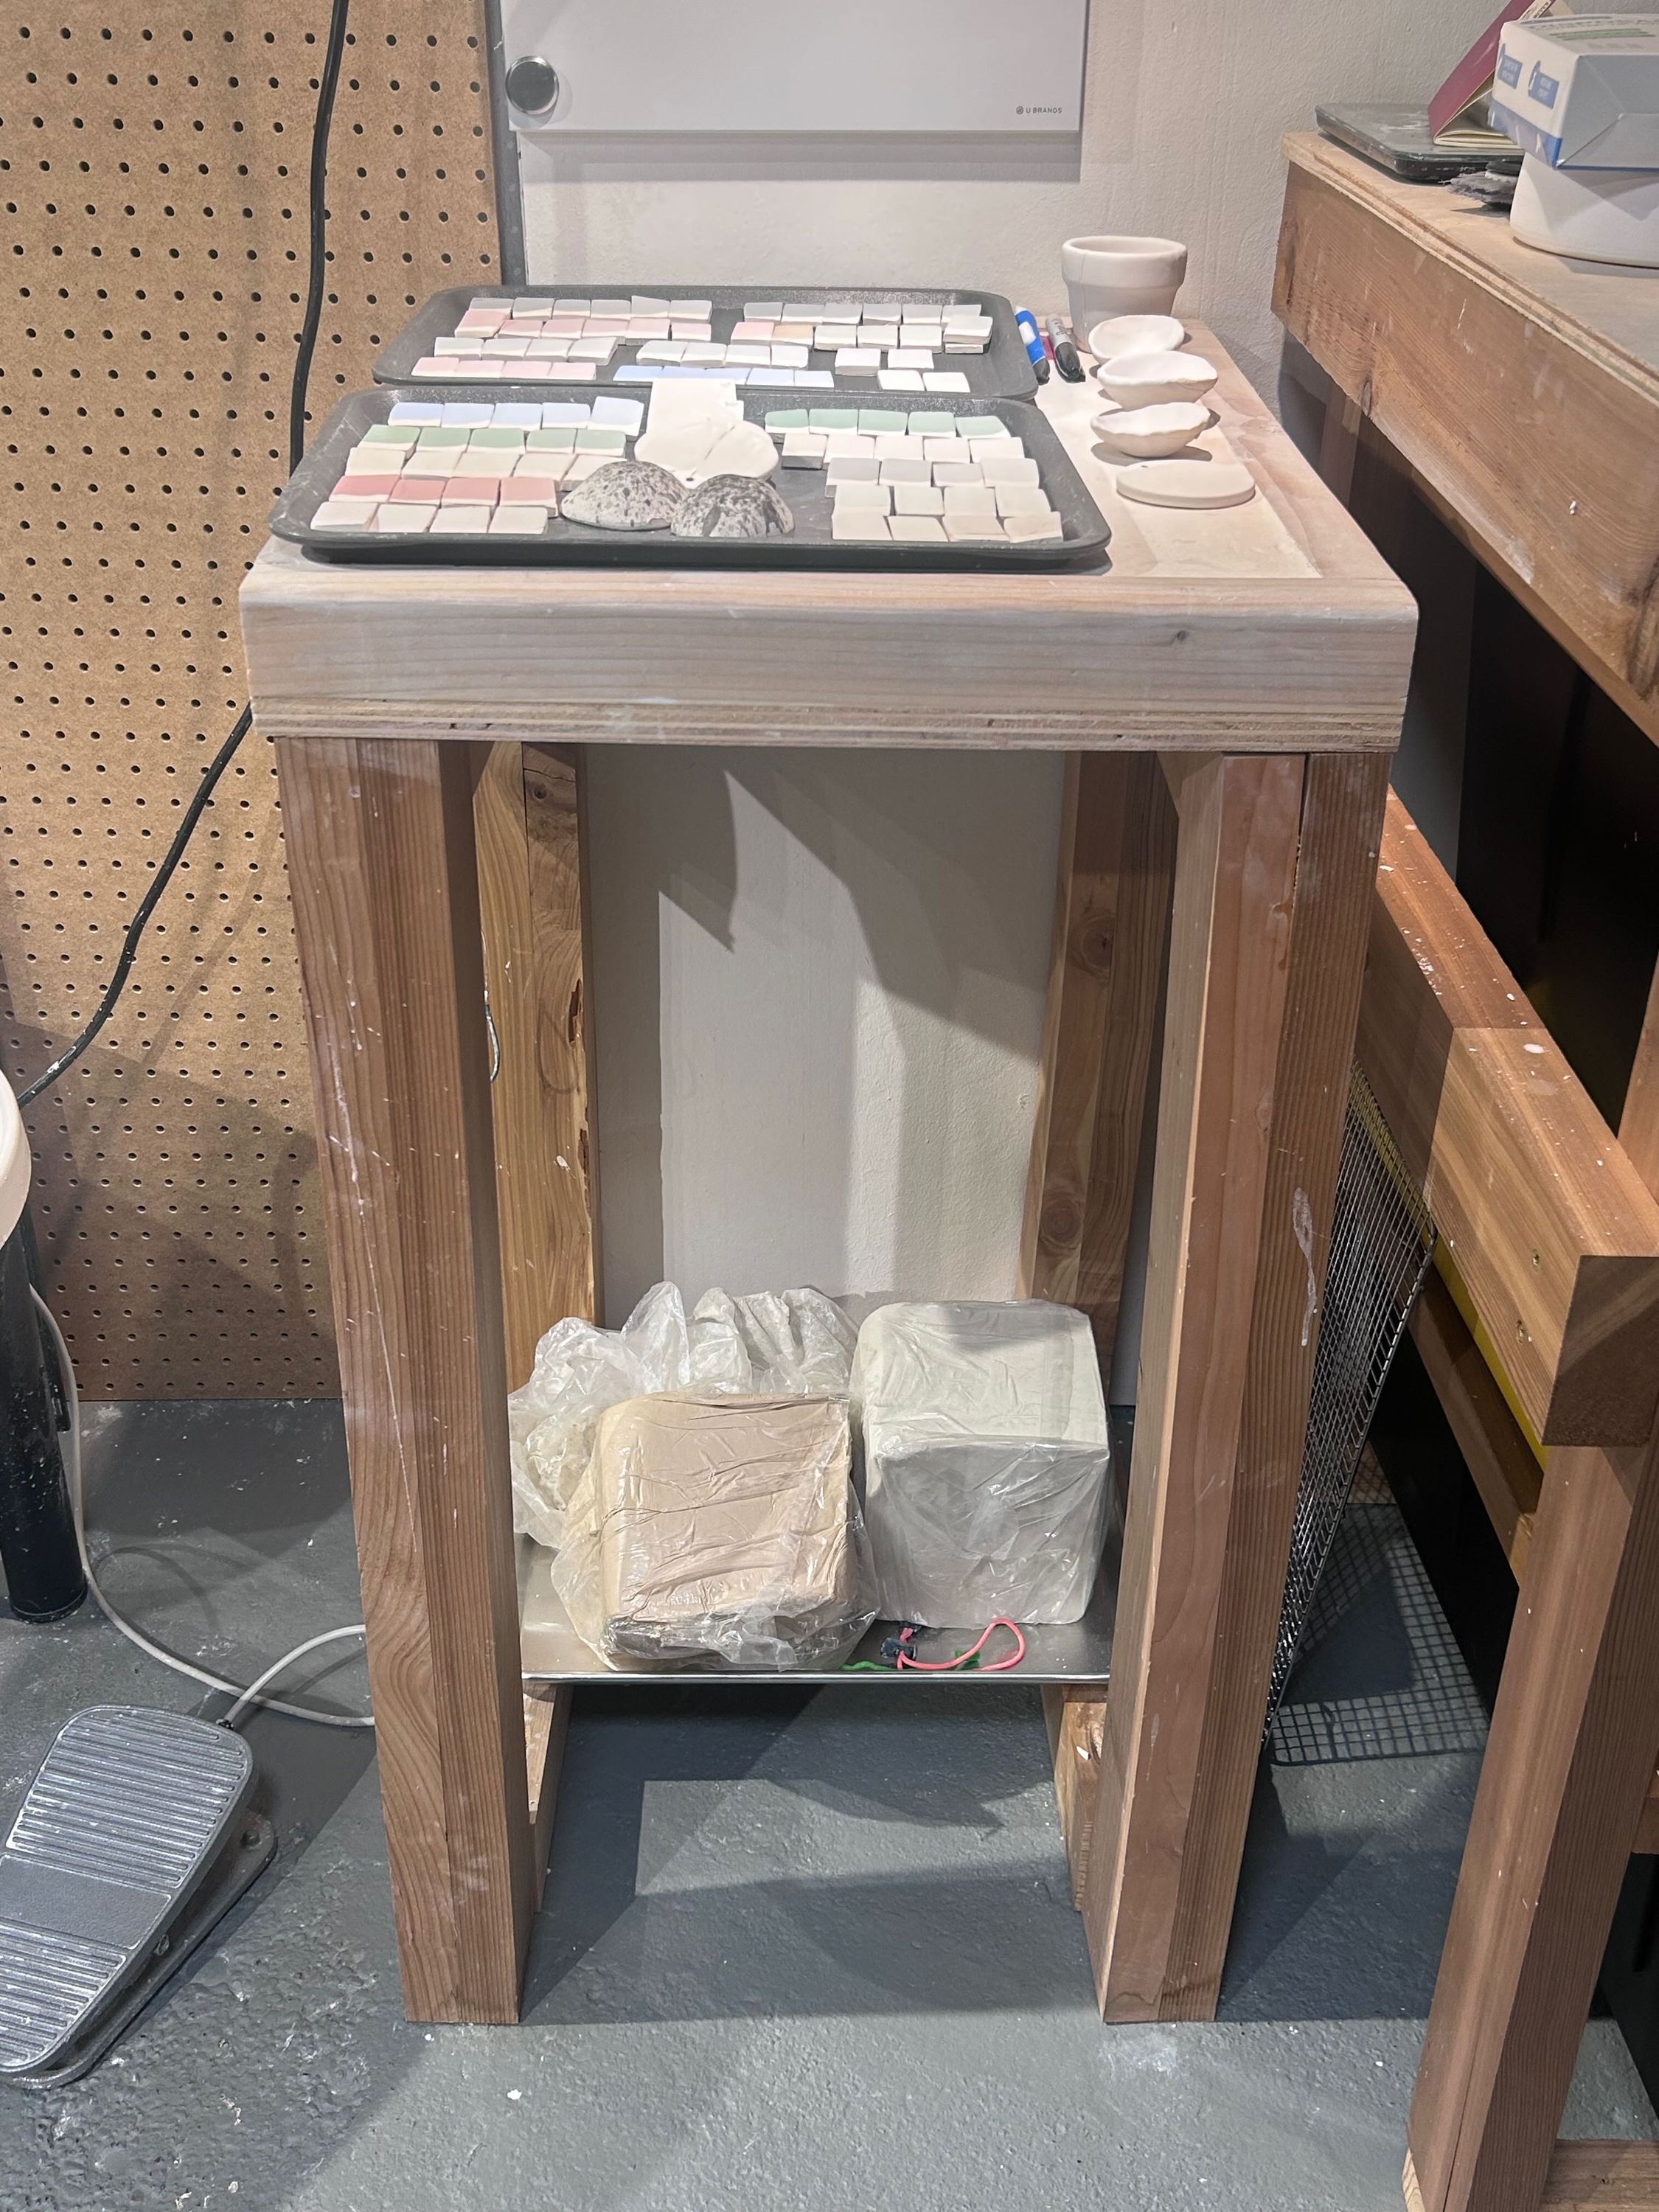 Wedging table
Wheel area, tools corner & reclaim zone
To the left of the wedging table is my wheel, the first piece of equipment I purchased. Some nails on the side of the wedging table hold cutting wires and cleaning cloths. The floor around this area gets pretty gnarly after a day of throwing so I do mop it more frequently here. My concrete floor isn’t flat and has a lot of texture in this spot, so I may look into a floor covering around this area to make it easier to clean.
To the left of the wheel is where I keep wheel throwing tools. A baby bottle drying rack makes for a good place to store wet ribs and sponges. I also have a pot lid organizer that stores my bats vertically, and Giffin Grip I’m borrowing from a friend. On the bottom of the shelf I have two plaster boards I use for reclaim. After I throw on the wheel, I add all the slip and throwing water into a container and let it settle. The next day I’ll pour off as much water as I can, and dump the clay slurry on one of the plaster boards to dry and subsequently process as reclaim. This helps keep the water going down the sink to a minimum.
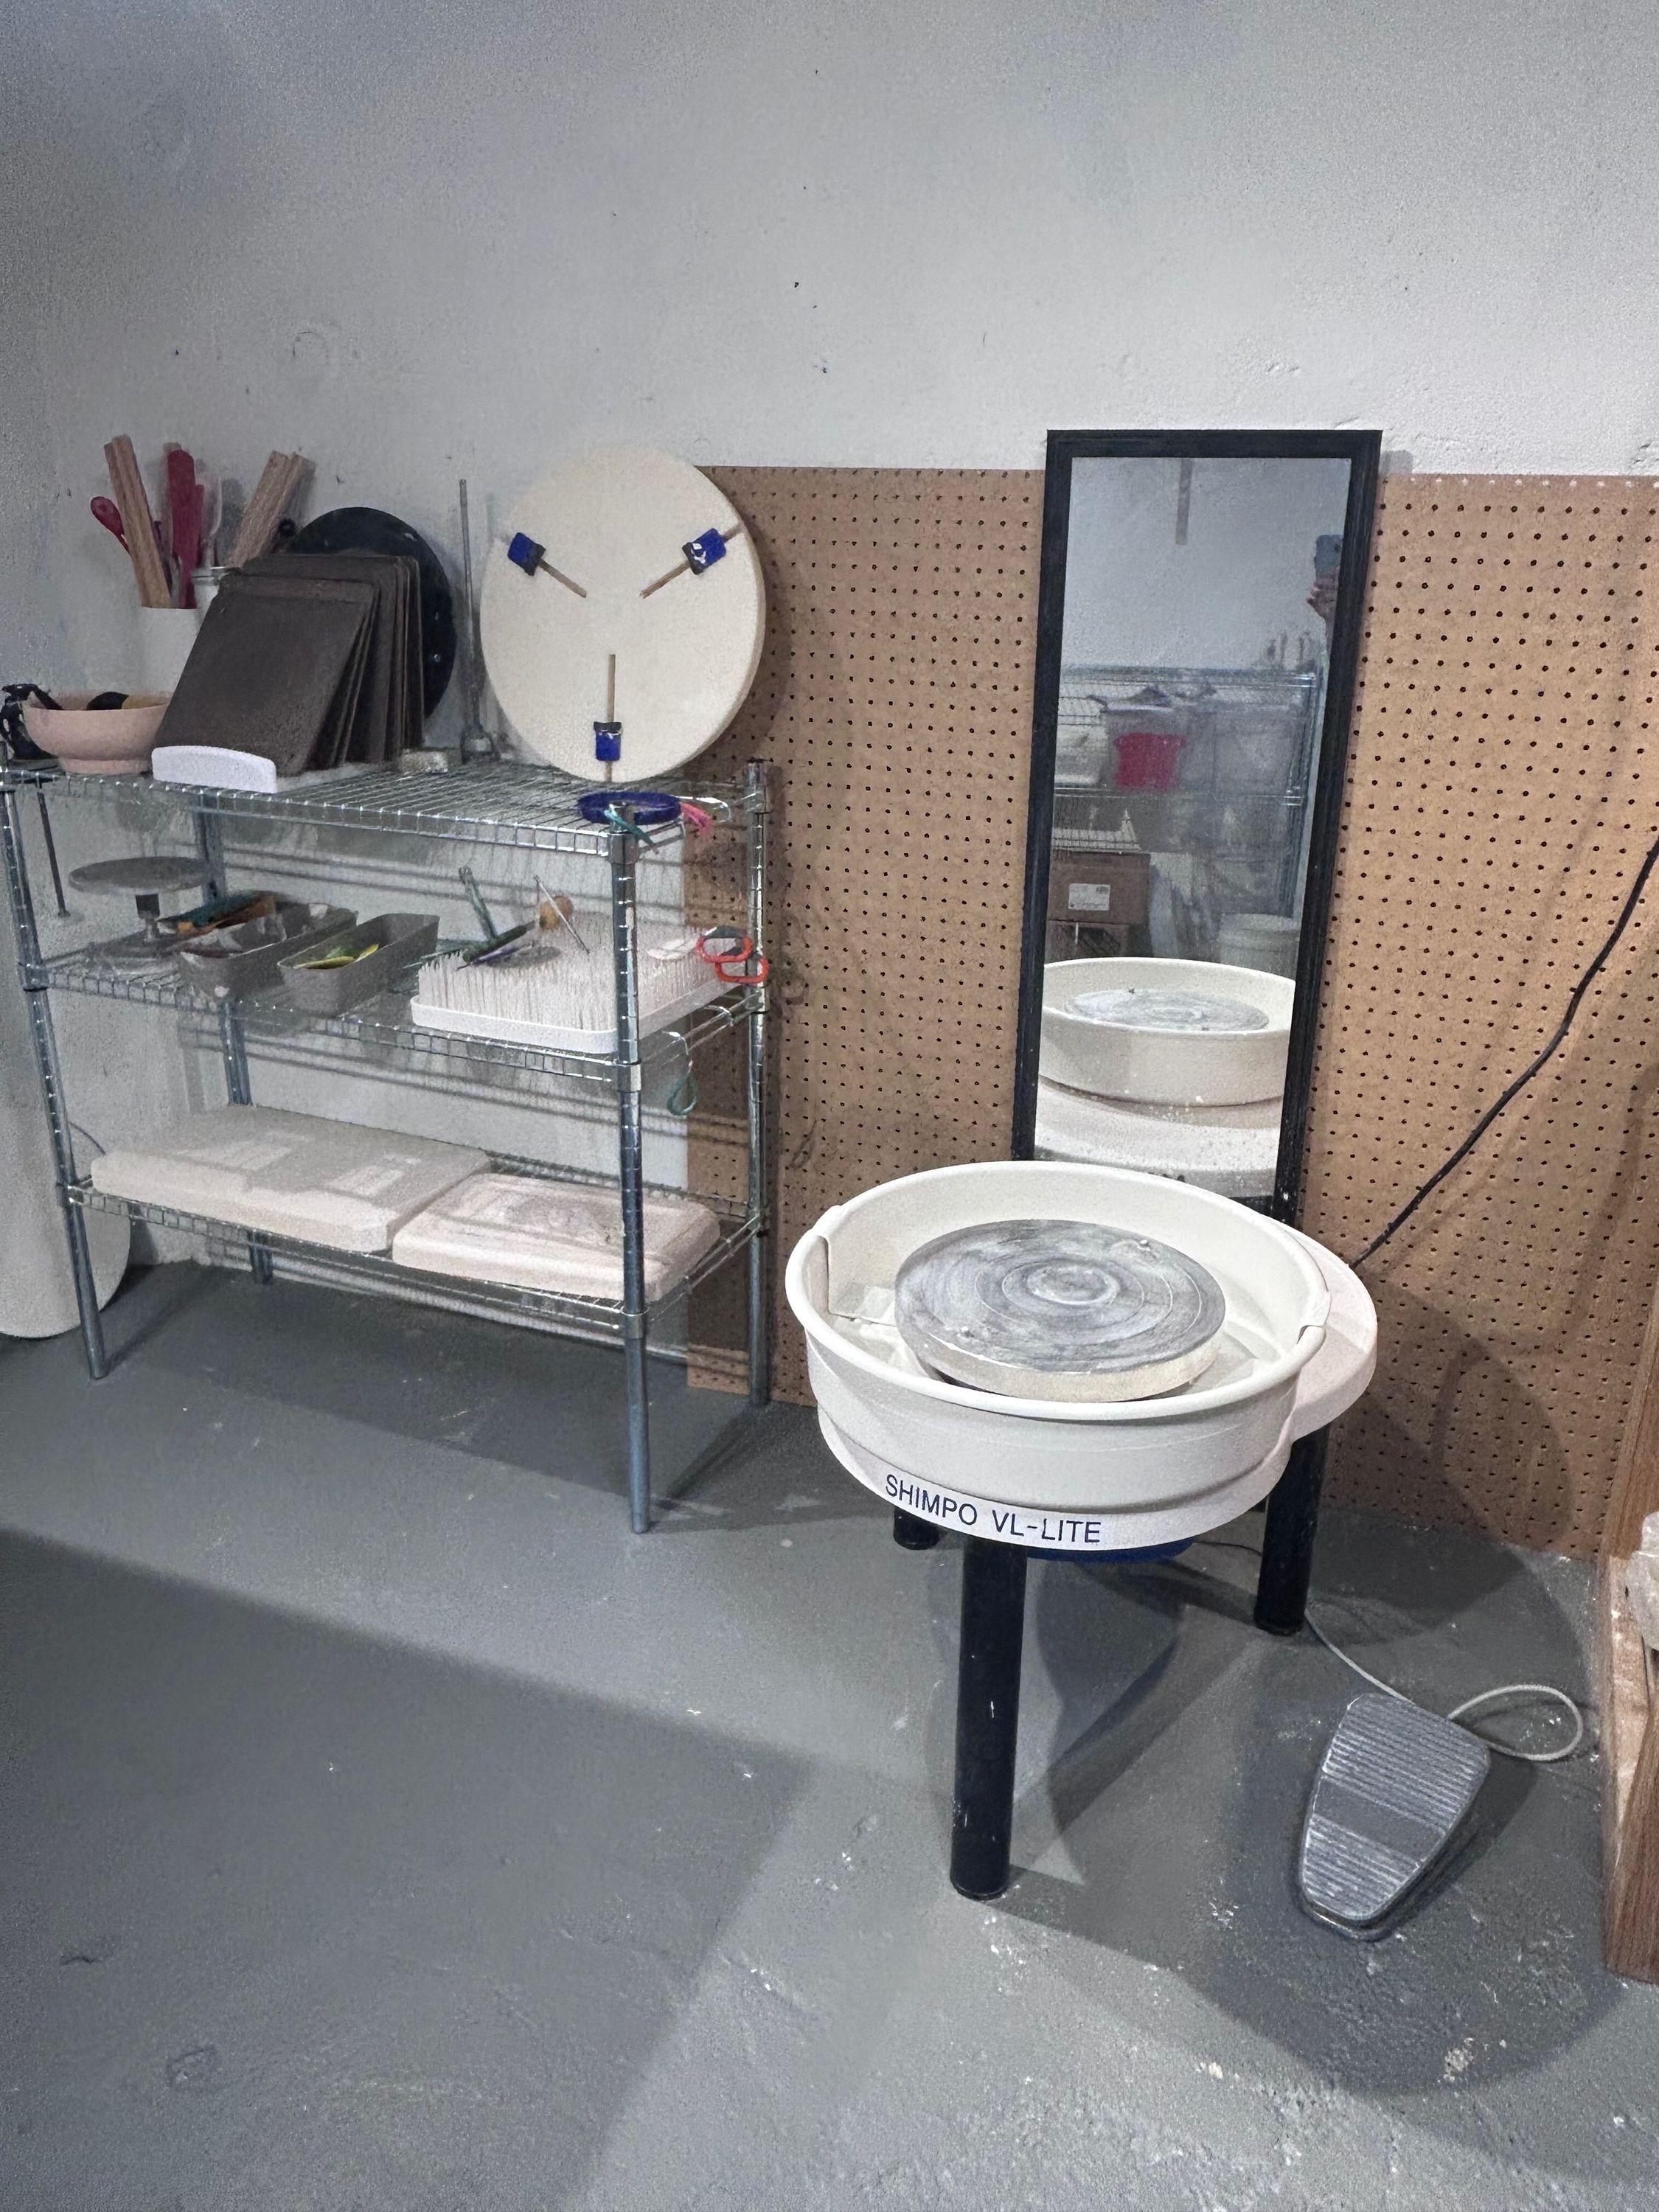 Tools corner
Work table
In the middle of the work area is my work table. This is just a very old desk I’ve had for years. I think its the only and oldest piece of furniture I’ve retains after moving countless times. Its sturdy but pretty beat up - I’ll likely never use this as a desk again but it works fine as a surface to roll out tiles, attach mug handles, place drying pots, etc. I use the same stool for wheel throwing at the work table.
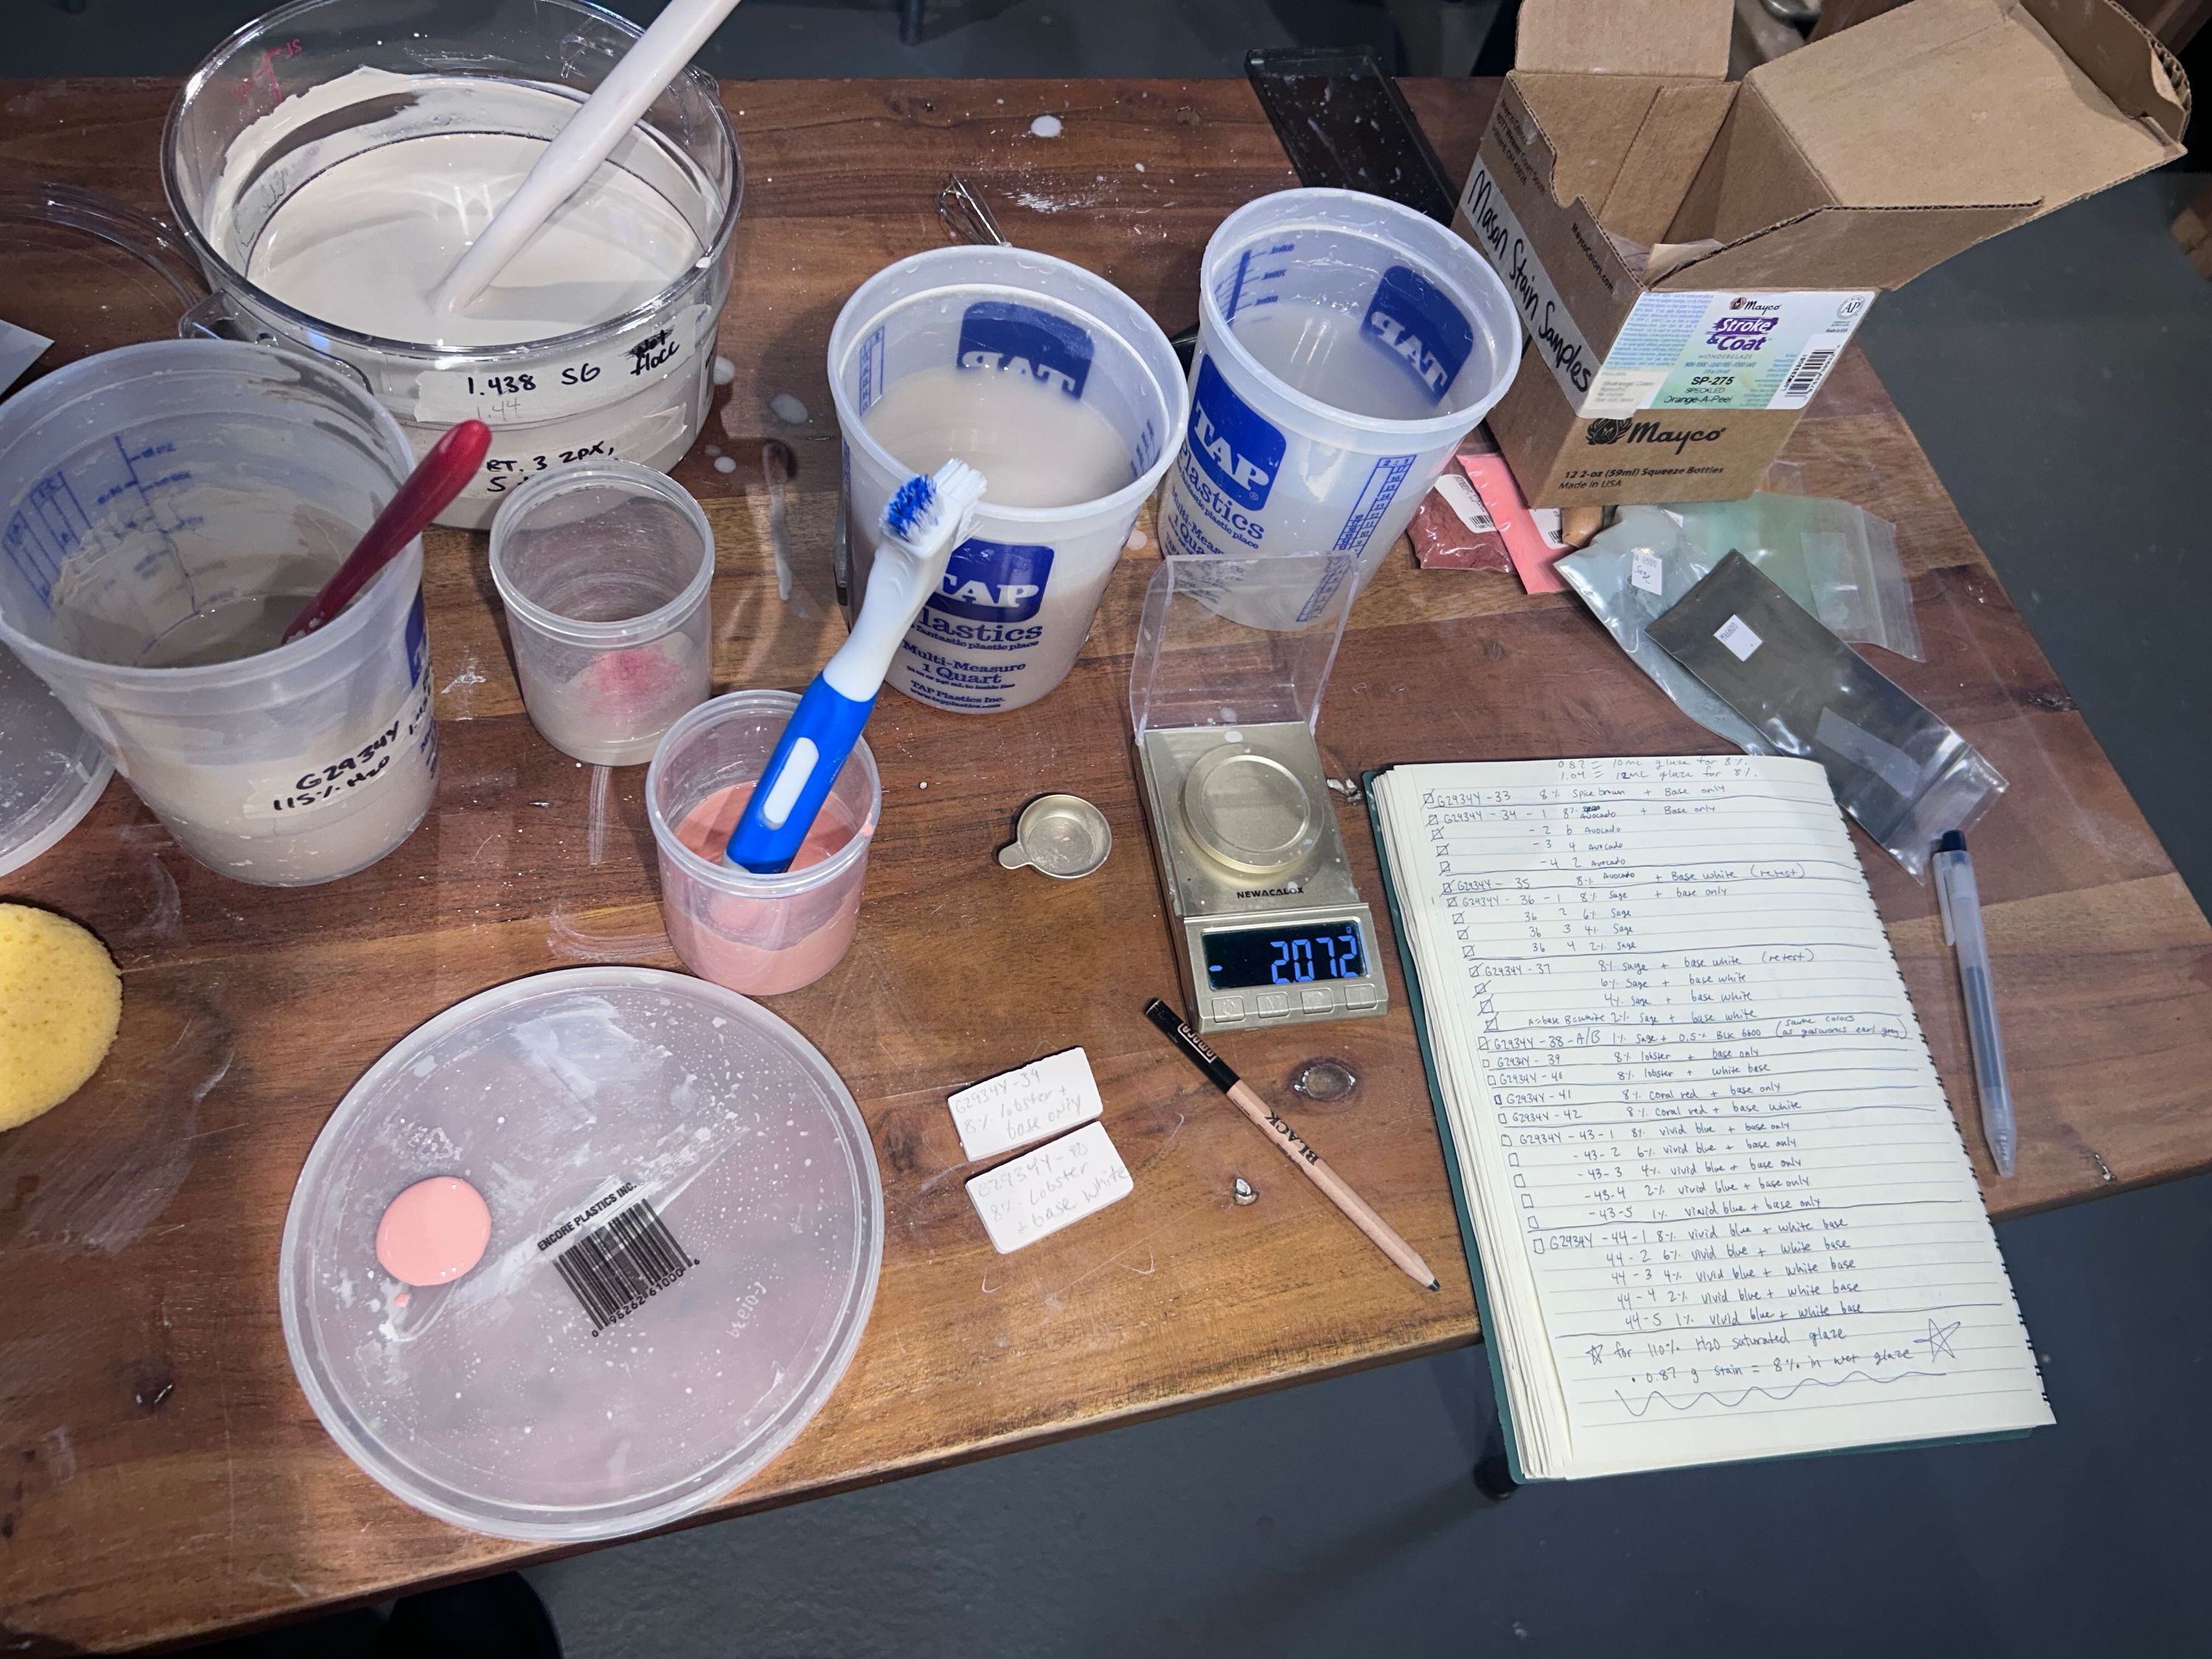 The work table during a recent round of making test tiles. Living by the oath of the CMW “Test, test, test!” motto.
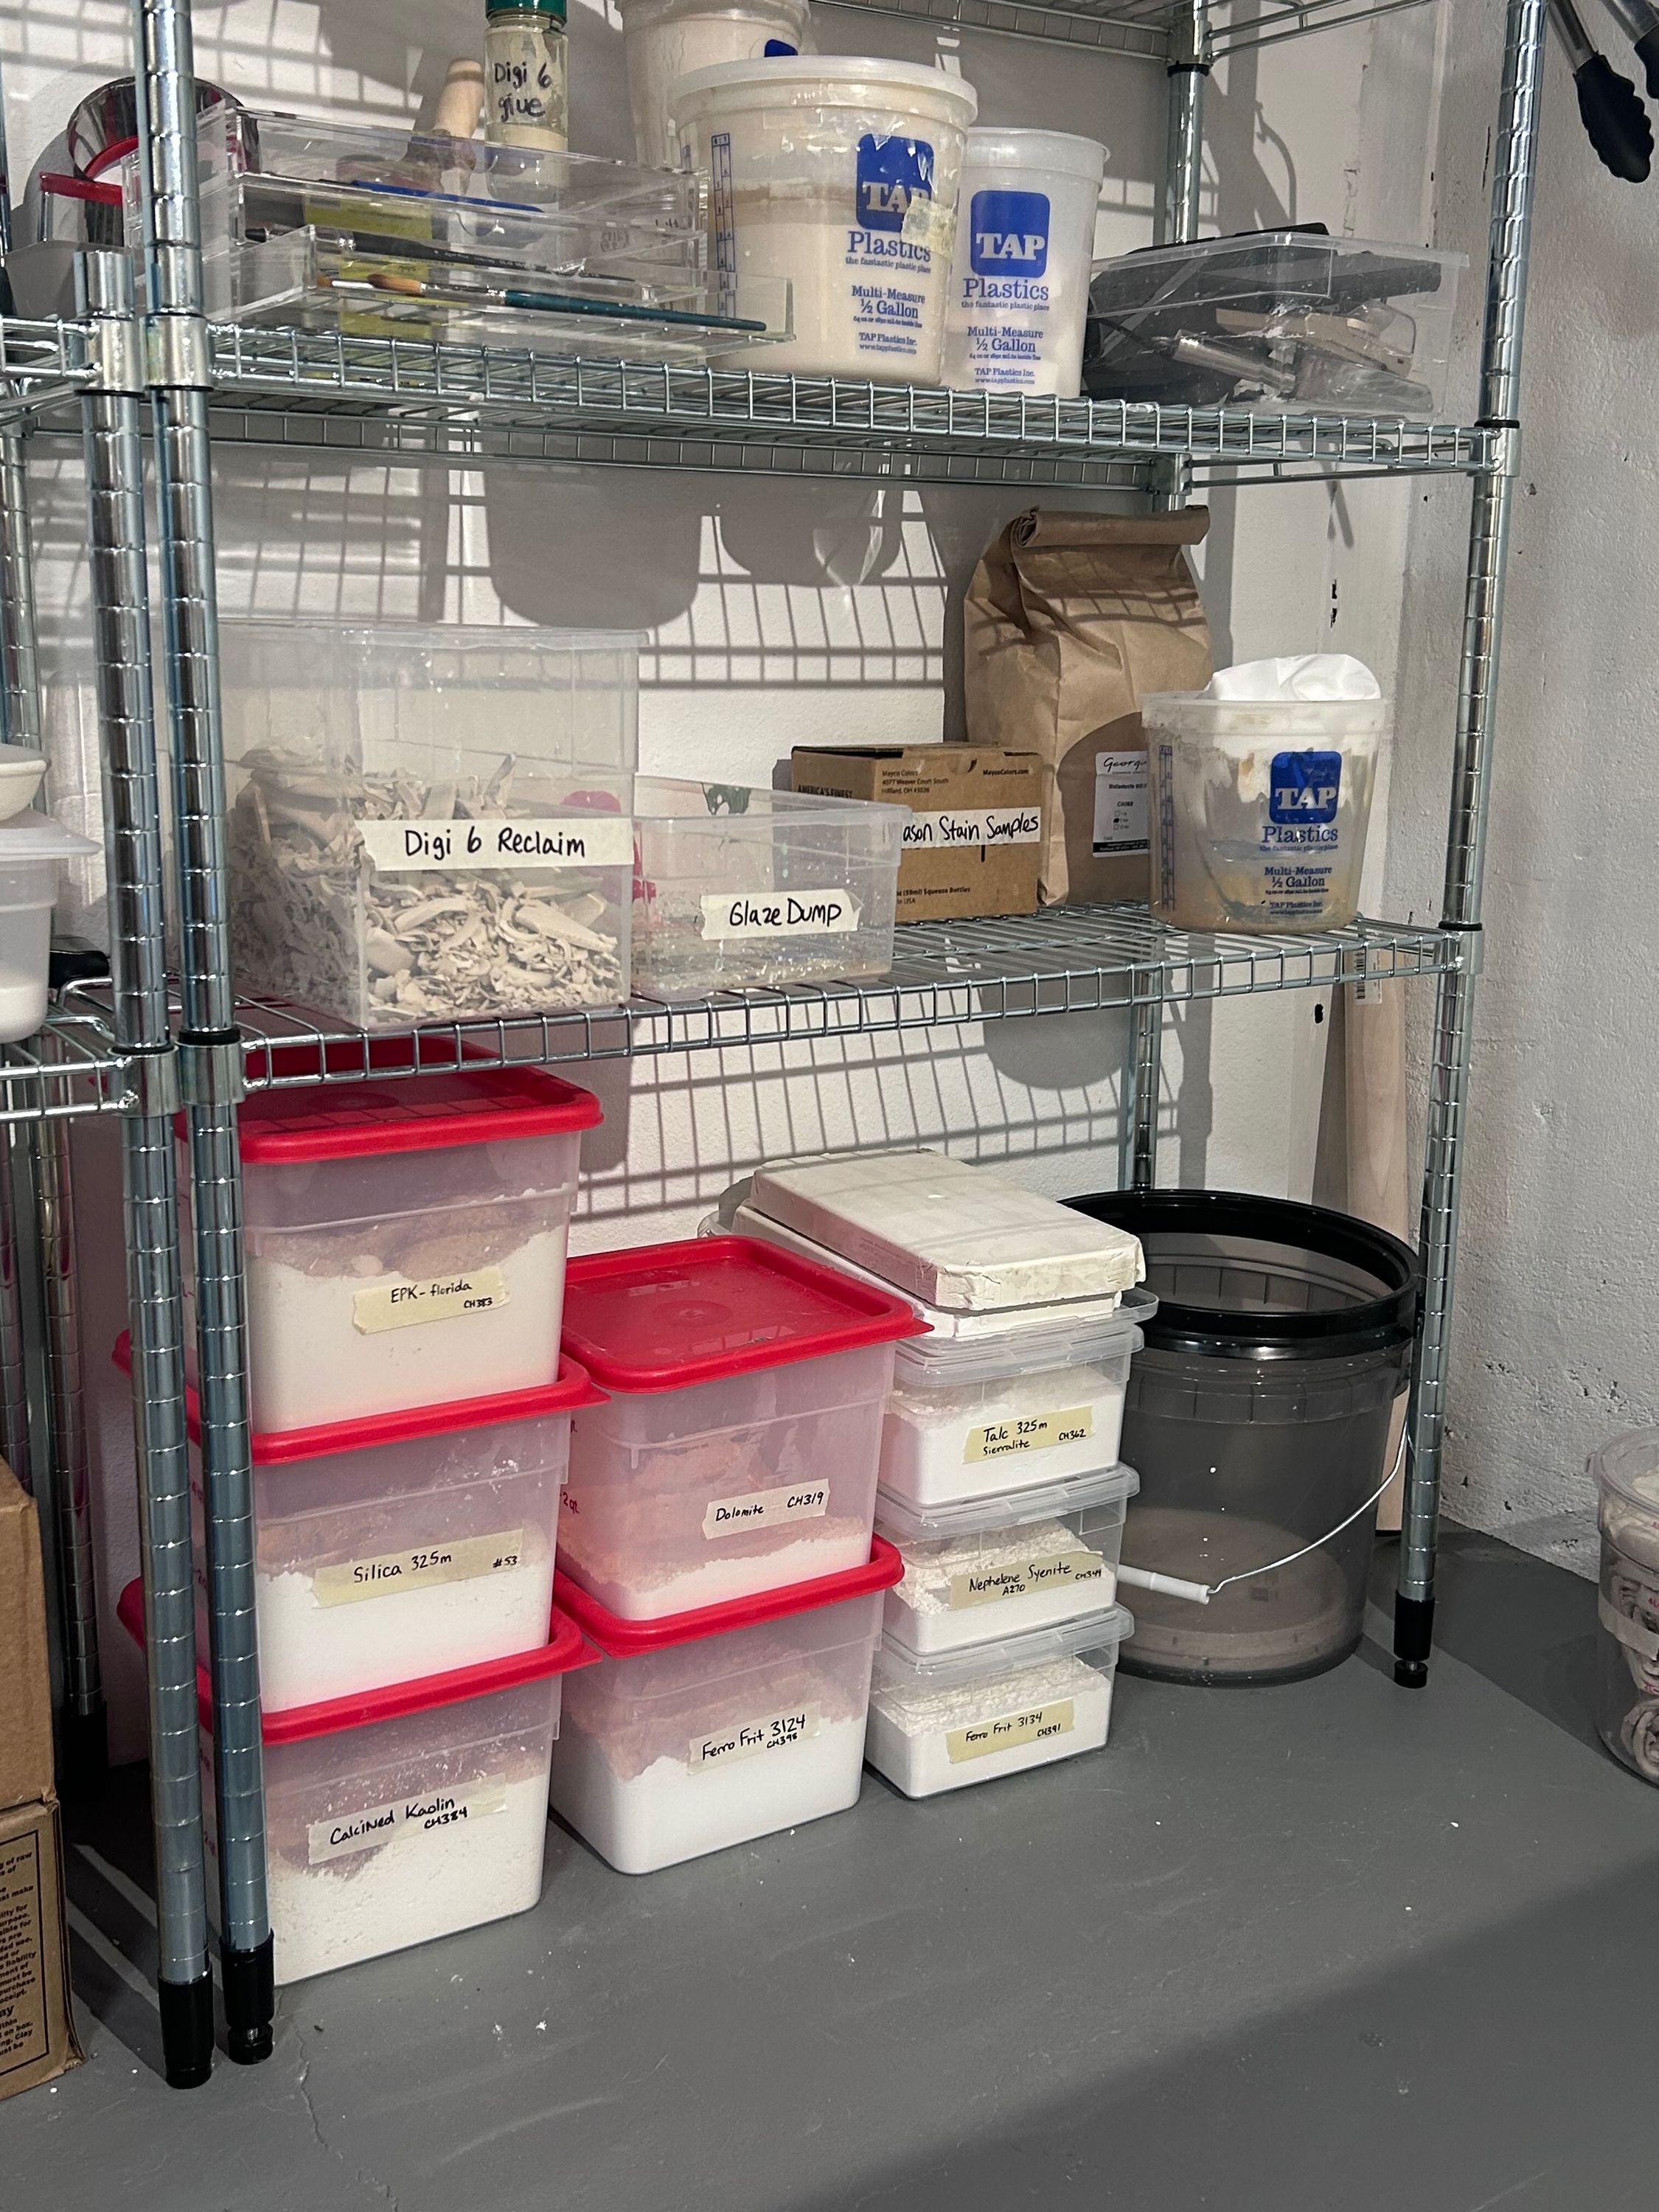
Glaze shelf & storage
The rack on the left side has some more niche clay tool accessories but it also is where all my glaze materials are stored. I have a couple of Cambro food service containers from my local restaurant supply store that I use to store my raw materials, and use smaller food containers to hold samples of glaze I’m testing.
The other half of the rack is more of an all purpose staging area where I’ll store bisque ware or things that are drying.
 Glaze shelf
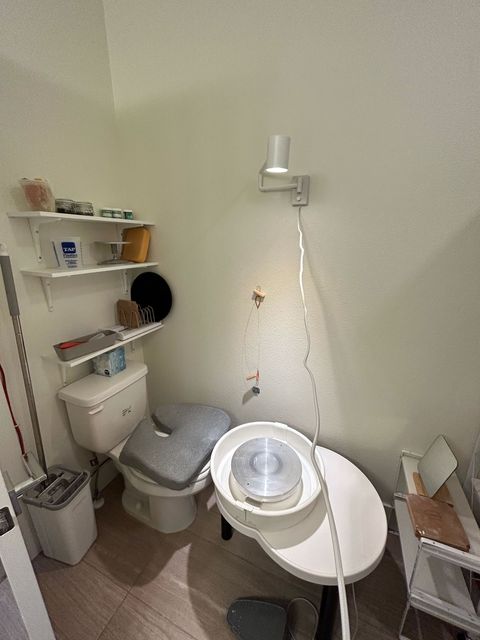
Sink & clay trap
A big plus to working in the basement (besides not being sweltering or freezing) has having access to a utility sink. Clay going down sinks is generally a big no-no (you can clog your pipes), but I take several precautions to limit the amount of clay sludge going down the drain:
- I wipe my tools and splash pans down with the throwing water after using the wheel, instead of rinsing off everything with fresh sink water
- I combine all of the clay that ends up into the splash pans with the throwing water and let it settle overnight. After the water has separated from the clay, I pour the mixture onto a plaster bat to dry and reclaim.
- I minimize glaze waste when testing by using the smallest milliliter volume possible for my test tiles. Any discarded glaze goes into a container that will eventually harden and dry, and be discarded.
- I have installed a Gleco Trap under the utility sink to capture any remaining sediment. This works really well, and was easy to install.
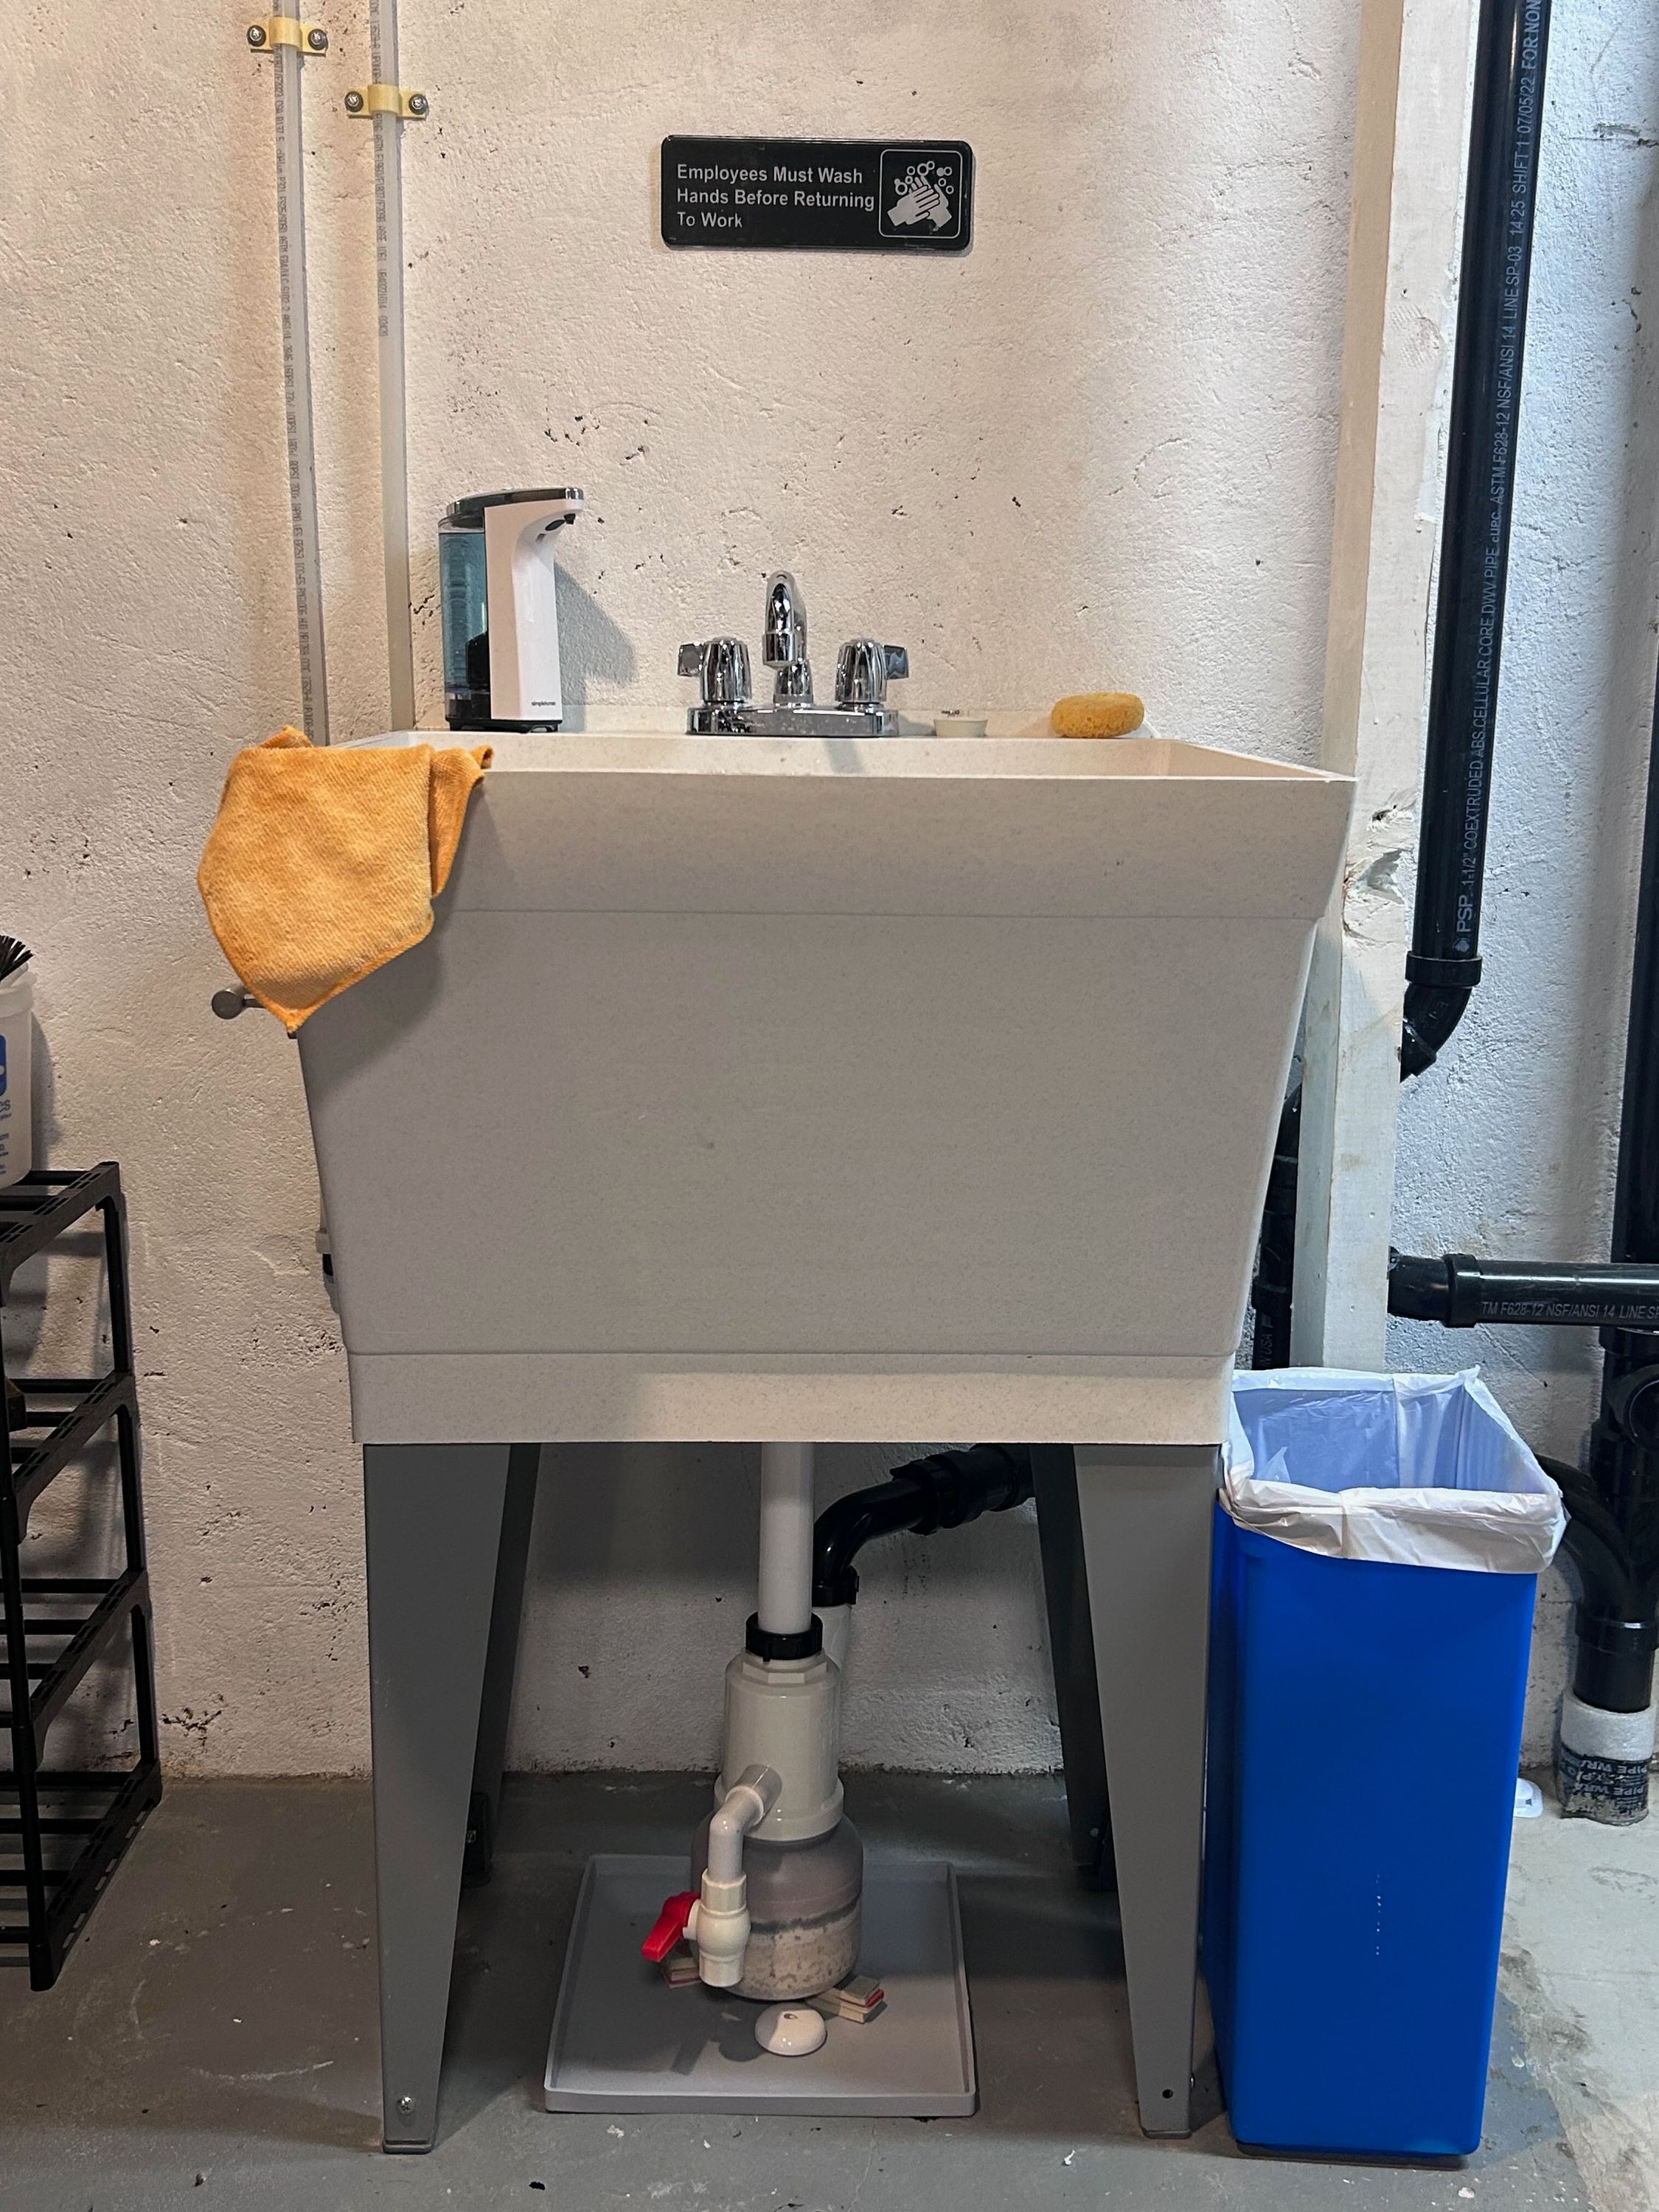 Gleco trap installed where the existing P-trap is. A water leak sensor gives me extra peace of mind that every jar replacement goes smoothly. I’ve only had it leak once and I was able to fix it quickly.
Kiln shed
Outside in the shed is my kiln. The Skutt 818 size is good for me right now. Its big enough to handle about 6 mugs per shelf and I don’t have to wait too long to amass things to fire. It can go up to cone 10 but I haven’t attempted that yet as I’ve found a clay body at cone 6 I’m happy with. I have the kiln vented outside, which in hindsight is probably a little overkill since the kiln isn’t in the primary living area and I don’t work with luster.
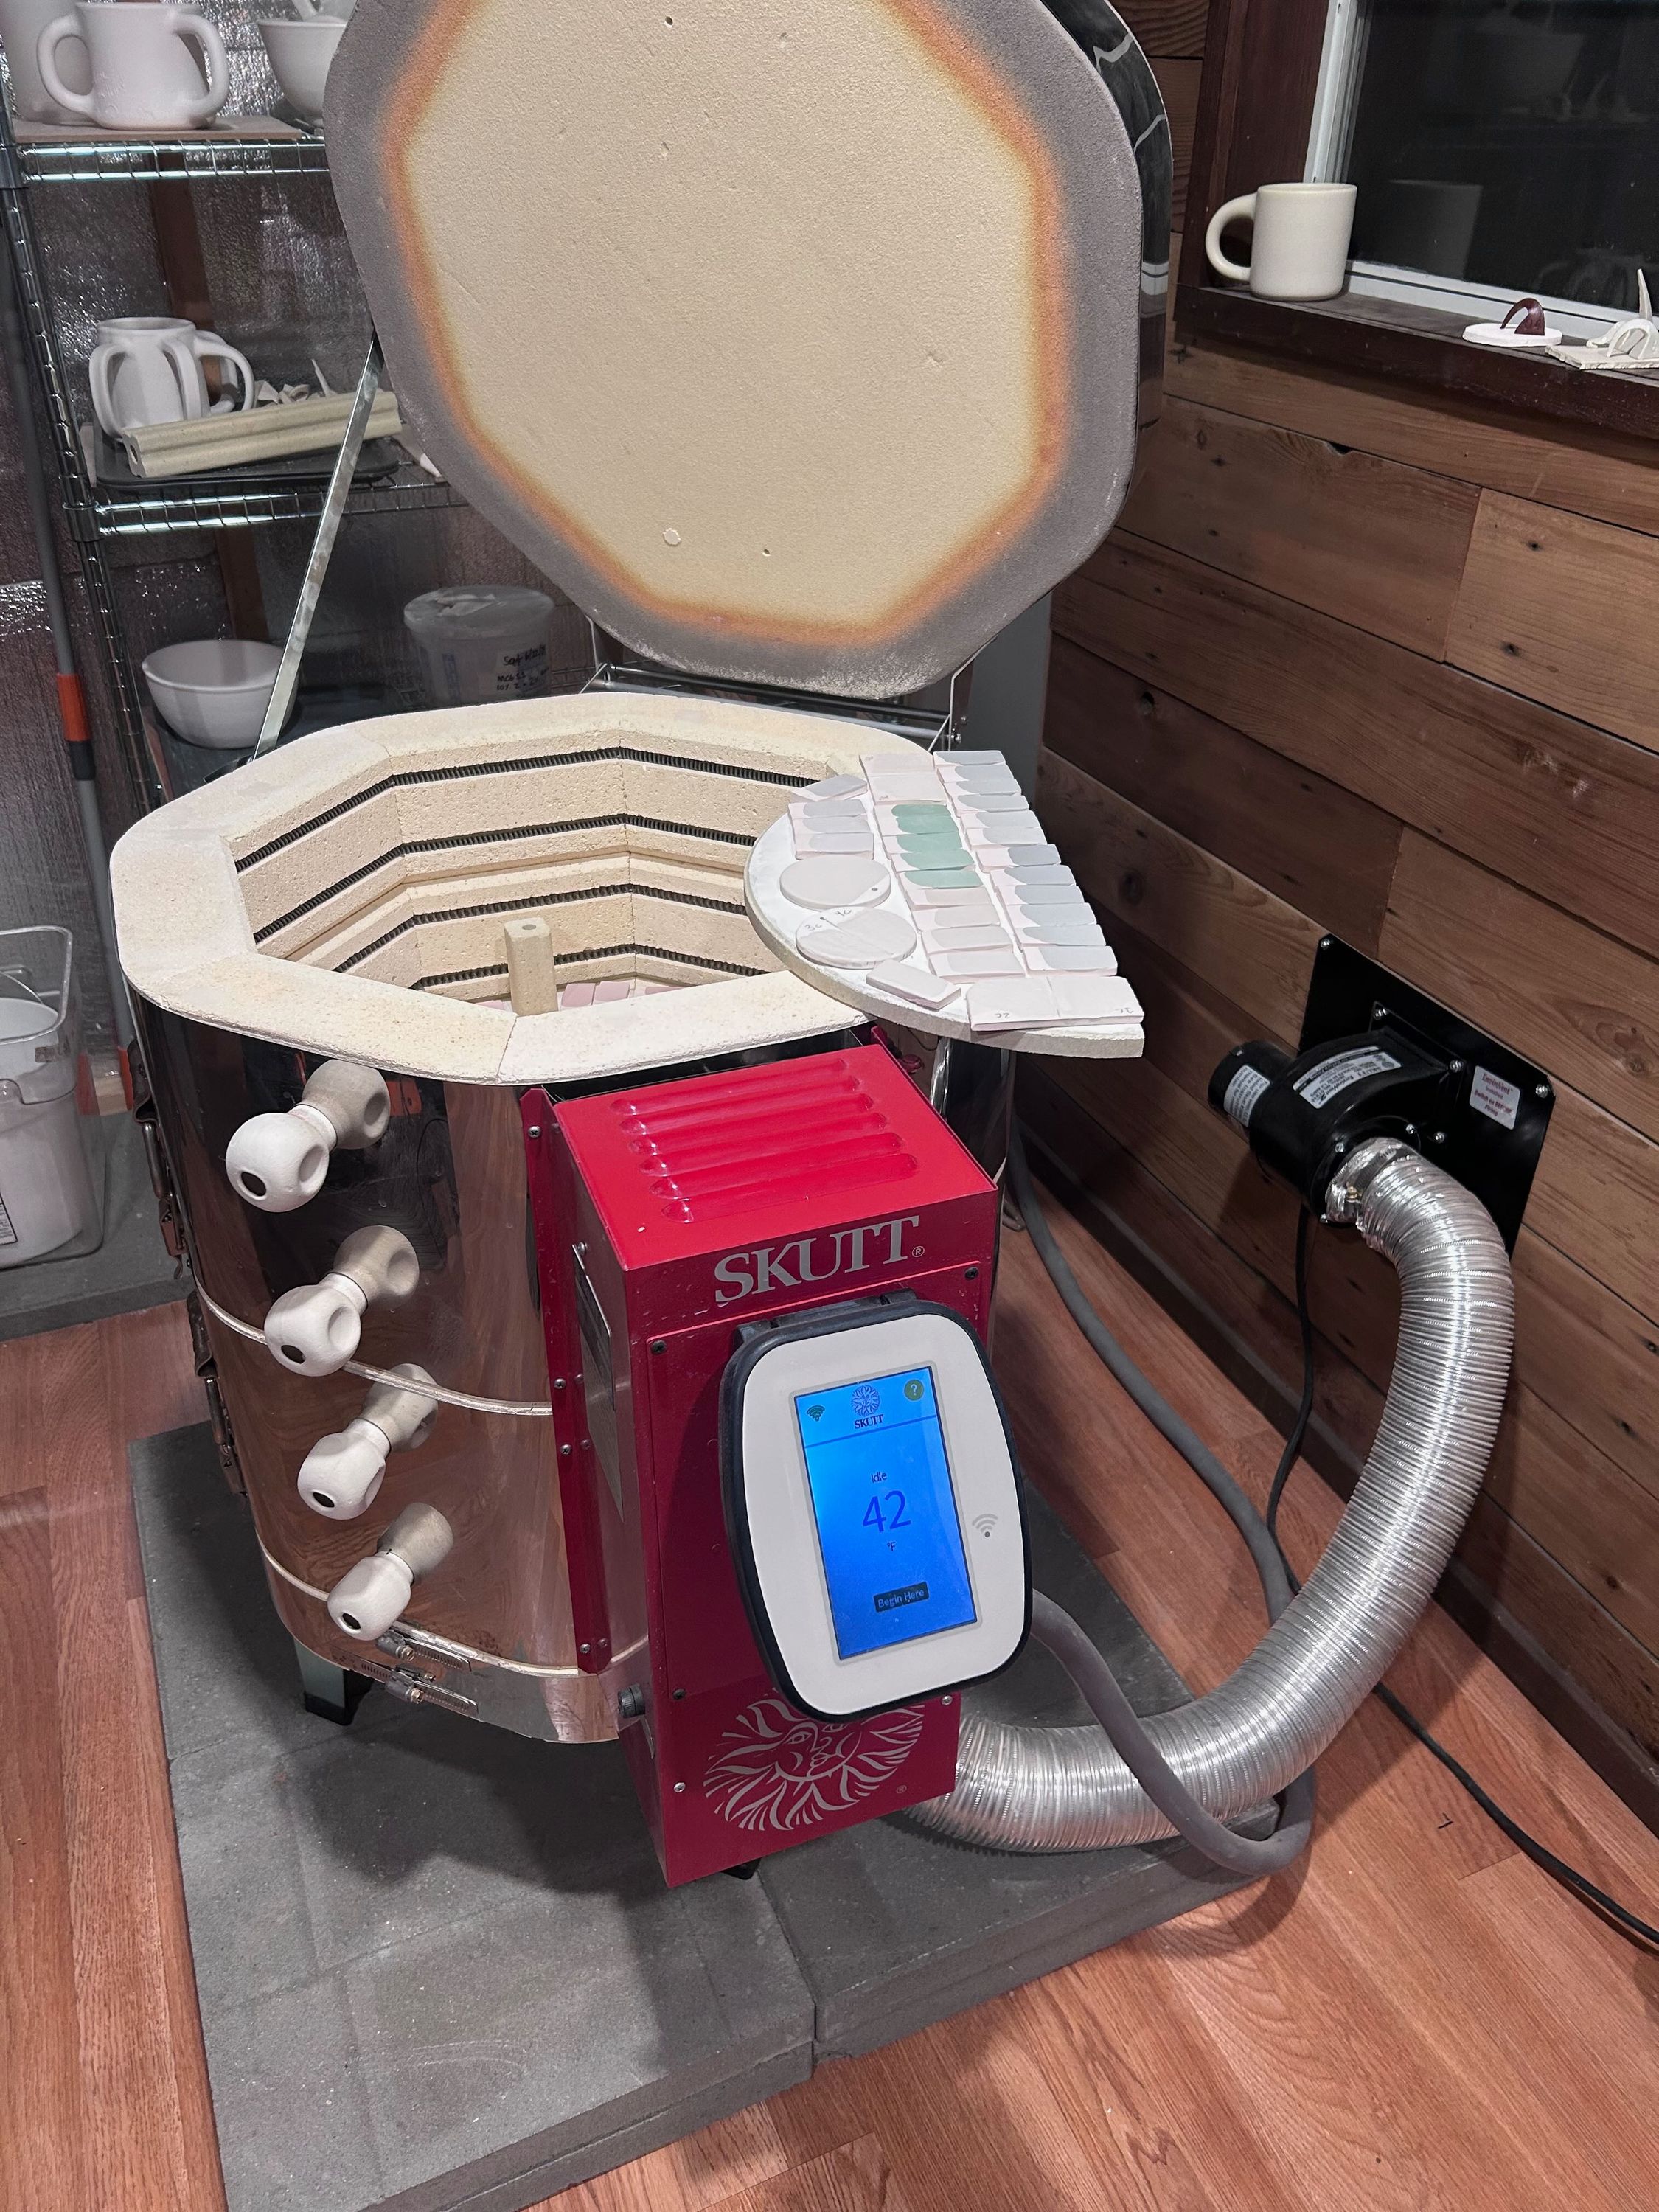 My Skutt KMT-8183 kiln in the middle of loading.
That’s the setup. I’m still adjusting it over time, and I’ve learned to be flexible in what I’d expect out of a workspace. I’ll likely need to organization a bit more once once I start making larger buckets of glaze - but its a constant evolution as I figure out what works for me.
Sign up below to get updates about new posts & work!